
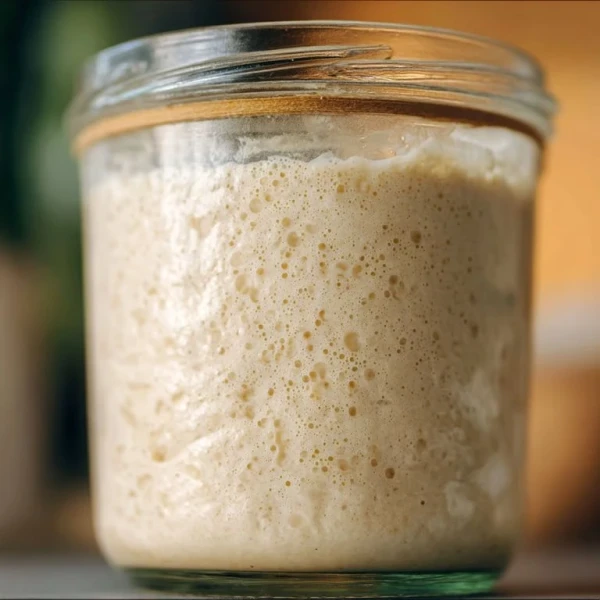
There's something almost magical about creating a sourdough starter from scratch. With nothing but flour, water, and patience, you'll cultivate a living culture of wild yeast and beneficial bacteria that will transform your bread baking forever. This bubbling jar of fermented goodness might seem mysterious at first, but it's surprisingly straightforward once you understand the process. In about five to seven days, you'll have an active, vigorous starter ready to create loaves with that signature tangy flavor, chewy texture, and beautiful open crumb that makes sourdough so irresistible. Whether you're a complete beginner or looking to refine your technique, this guide will walk you through every step of bringing your starter to life.
Why I Love This Recipe
Making your own sourdough starter is like welcoming a new pet into your kitchen—one that rewards you with the most incredible bread you've ever tasted. Unlike commercial yeast, your starter develops unique flavors from the wild yeasts and bacteria in your environment, making your bread truly one-of-a-kind. The process connects you to centuries of bread-making tradition while being surprisingly economical, requiring only two ingredients that cost pennies. Once established, a well-maintained starter can last decades, even generations, becoming a cherished kitchen heirloom. The satisfaction of slicing into a crusty, tangy loaf knowing you created everything from scratch—from the living culture to the final bake—is incomparable. Plus, sourdough's natural fermentation makes bread more digestible and nutritious, breaking down gluten and phytic acid while developing complex flavors that store-bought bread simply cannot match. Your starter becomes a living record of your baking journey.

What You Need From Your Kitchen
Glass Jar with Loose Lid
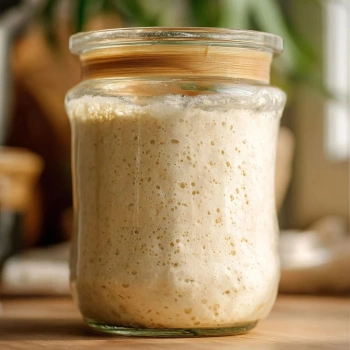
A wide-mouth quart-sized jar allows you to easily monitor fermentation activity and provides room for the starter to expand as it becomes active, while a loose lid lets gases escape without creating pressure buildup
Kitchen Scale
Measuring by weight rather than volume ensures consistency in your flour-to-water ratio, which is crucial for developing a healthy, predictable starter that rises reliably
Rubber Band
Marking your starter's level after each feeding helps you track its growth pattern and know when it has doubled in size, indicating peak activity
Wooden or Plastic Spoon
Avoiding metal utensils prevents any potential reaction with the acidic starter, and a sturdy spoon makes mixing the thick mixture easier
Room Thermometer
Maintaining temperatures between 70-75°F creates ideal conditions for fermentation, helping you troubleshoot if your starter is sluggish or overactive
Perfect Pairings
Classic Sourdough Loaf
Your active starter is the key ingredient for creating rustic artisan bread with that signature tangy flavor, chewy crust, and open crumb structure that defines excellent sourdough
Sourdough Pancakes
Use your starter discard to create incredibly fluffy, flavorful pancakes that have a subtle tang and complex flavor, turning what would be waste into a delicious breakfast
Sourdough Pizza Dough
The starter adds incredible depth of flavor to homemade pizza crust while creating a perfectly chewy texture with beautiful char spots
Sourdough Crackers
Transform excess starter into crispy, addictive crackers seasoned with herbs and sea salt—a zero-waste way to enjoy your starter's tangy flavor
Sourdough English Muffins
These nooks-and-crannies breakfast treats become even more delicious with sourdough's characteristic tang and improved texture from natural fermentation
Pro Tips
- Keep a consistent feeding schedule at the same time each day to establish a predictable fermentation rhythm, making it easier to know when your starter will peak for baking.
- Use the same flour brand consistently during the establishment phase, as switching flours can temporarily disrupt your starter's balance and activity level until it adapts.
- Mark your jar with permanent marker showing measurements for 1/4 cup, 1/2 cup, and 1 cup to make feeding easier without dirtying measuring cups every single day. }}
🍳 Your Cooking Progress
Ingredients Gathered
0/4 CompleteCooking Steps
0/6 CompleteRecipe Mastery
0% CompleteHomemade Sourdough Starter
Create your own active sourdough starter from scratch with just flour and water. This living culture is the foundation for incredible artisan breads with complex flavor.
Ingredients
💡 Click on ingredients to check them off!
- 2 cups all-purpose flour (divided into daily feedings)
- 2 cups filtered or bottled water at room temperature (divided into daily feedings)
- 1/4 cup whole wheat flour (optional, for initial feeding to boost wild yeast)
- Clean glass jar with capacity of at least 1 quart
Instructions
💡 Click on steps to mark as complete!
-
1Day 1 - Initial MixCombine 1/2 cup all-purpose flour with 1/2 cup room temperature water in your clean glass jar, stirring vigorously until no dry flour remains and the mixture resembles thick pancake batter. Cover loosely with the lid or breathable cloth and place in a warm spot away from direct sunlight, ideally between 70-75°F. You won't see much activity yet, but wild yeast is already beginning to colonize your mixture.
-
2Day 2 - First CheckExamine your starter for any signs of activity like small bubbles or a slightly sour smell. Even if nothing is happening yet, discard half the starter (about 1/2 cup) and feed it with 1/2 cup fresh flour and 1/2 cup water, stirring thoroughly. Mark the level with a rubber band to track growth. This daily discarding and feeding establishes a healthy yeast population.
-
3Day 3-4 - Building ActivityContinue the daily routine of discarding half and feeding with equal parts flour and water. By day three or four, you should notice increased bubbling, a pleasant sour aroma, and the starter rising noticeably between feedings. The consistency should remain like thick batter, and you might see it double in size within 8-12 hours after feeding, which indicates strengthening fermentation.
-
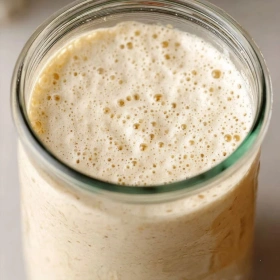
4Day 5-7 - Peak PerformanceYour starter should now be vigorously bubbly, doubling in size within 4-8 hours after feeding, with a domed surface covered in bubbles. The aroma should be pleasantly tangy and yeasty, not harsh or acetone-like. Conduct the float test by dropping a spoonful into water—if it floats, your starter is ready for baking. If not quite there, continue daily feedings until it passes.
-
5Maintenance FeedingOnce active, feed your starter every 24 hours if kept at room temperature, or store it in the refrigerator and feed weekly. For each feeding, discard all but 1/4 cup starter, then add 1/2 cup flour and 1/2 cup water. Always use room temperature water and bring refrigerated starter to room temperature before feeding. This regular feeding keeps the yeast population healthy and active.
-
6Using Your StarterAlways feed your starter and wait until it peaks (doubled in size and domed on top) before using it in recipes, typically 4-8 hours after feeding. Use only the amount your recipe calls for, then immediately feed the remaining starter to keep it going. Never use all your starter in a recipe—always save at least 1/4 cup to continue the culture and maintain your sourdough journey.
Nutrition Facts (Per Serving)
Chef's Notes
- Use filtered or bottled water if your tap water is heavily chlorinated, as chlorine can inhibit wild yeast growth. Let tap water sit out overnight to allow chlorine to dissipate if you prefer not to buy bottled water.
- Whole wheat or rye flour can jumpstart your starter on day one because they contain more wild yeast and nutrients than white flour, but switch to all-purpose flour for regular feedings to develop a milder flavor.
- A clear liquid layer on top (called hooch) indicates your starter is hungry and needs feeding. Simply stir it back in and feed promptly, or pour it off if you prefer a milder flavor in your starter.
- Temperature dramatically affects fermentation speed. Cooler kitchens (65-70°F) will slow the process, while warmer spots (75-80°F) accelerate it. Avoid temperatures above 85°F, which can encourage unwanted bacterial growth.
- If your starter develops mold, pink or orange streaks, or smells rotten rather than pleasantly sour, discard it completely and start fresh. A healthy starter should smell yeasty, tangy, and slightly alcoholic, never putrid.
- Save your daily discards in a jar in the refrigerator throughout the week to use in discard recipes like pancakes, crackers, or muffins rather than wasting this flavorful ingredient. Discard accumulates quickly and is perfect for quick breads.